Homemade Apple Cider Vinegar: A Simple Two-Stage Ferment
Key takeaways
- This is a genuine two-stage ferment — sugar becomes alcohol first, then alcohol becomes acetic acid. Rushing either stage gives a weak or off-tasting vinegar.
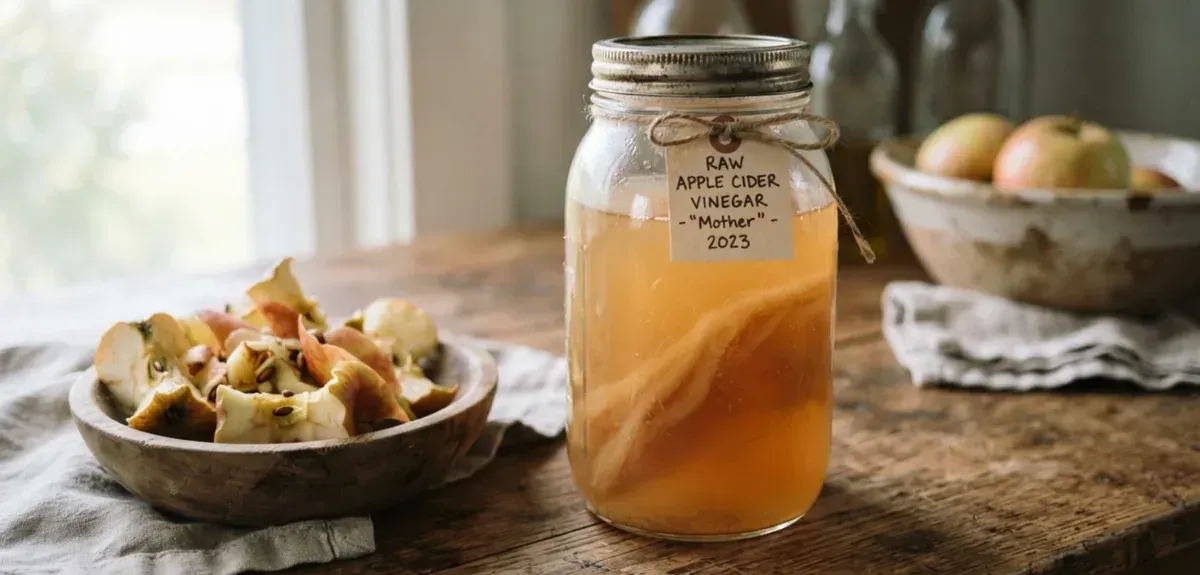
- A splash of raw, unfiltered vinegar with the "mother" is what introduces the right bacteria and speeds up the second stage.
- For the one health benefit with solid evidence behind it (blood sugar), dilute a tablespoon in a full glass of water — undiluted vinegar can damage tooth enamel.
- Naturally vegan, gluten-free, and preservative-free — the cloudy "mother" strands you'll see are beneficial, not spoilage.
Ingredients
Check off ingredients as you go
My mother always had a jar of something fermenting quietly on top of the fridge, and apple cider vinegar was one of the more forgiving ones to learn on — it’s genuinely hard to mess up if you leave it alone and don’t rush it. This is the version I still make in Helsinki, mostly because it’s satisfying to turn apple scraps — the same apples I’d otherwise compost — into something I actually use every week.
Why this recipe works
The whole process rests on two separate groups of microorganisms doing sequential work, not one. First, wild yeast (helped along by the sugar you add) ferments the sugars in the apple and the added sugar into alcohol — the same basic first step as making cider. Then, acetic acid bacteria — introduced by the raw vinegar starter — take over and convert that alcohol into acetic acid, which is what makes vinegar taste like vinegar. Skip the starter or rush either stage and you’ll end up with something more like flat, sour cider than real vinegar.
For the honest breakdown of what apple cider vinegar can and can’t actually do for your health once it’s made, I’ve written that up separately in Apple Cider Vinegar Benefits: What the Research Actually Supports — the blood sugar evidence is solid, the detox claims are not, and I didn’t want to repeat all of that here when the recipe itself is the point of this page.
Ingredients and how to make it
Follow the checklist and steps above. A few things matter more than they look:
Use a cloth, not a lid. Fermentation needs airflow. A sealed jar traps gas from the yeast and can build pressure, and more importantly, it starves the acetic acid bacteria of the oxygen they need to do their job in the second stage.
Keep the apple submerged. Any piece sitting above the liquid line is exposed to air and is where mould, not vinegar, tends to start. A small weight or even a clean stone in a food-safe bag works if the pieces keep floating.
Don’t judge it too early. The switch from “smells like alcohol” to “smells like vinegar” can take anywhere from three weeks to two months depending on your kitchen’s temperature — warmer rooms move faster. Taste it weekly rather than going by the calendar.
My tip: If a batch ever grows a fuzzy, coloured mould on the surface rather than the flat, rubbery, translucent “mother” film, discard it and start again. The mother is harmless and often gets reused as a starter for the next batch; actual mould is not worth troubleshooting around.
Variations
Spiced vinegar. Add a cinnamon stick or a few whole cloves during the first fermentation stage, then remove them when you strain — it adds warmth without changing the process.
Using scraps instead of whole apples. If you save apple cores and peels in the freezer from other cooking (this is what I actually do most weeks), you can skip buying whole apples entirely once you have enough scraps saved up — roughly the same volume as 6 medium apples.
Stronger or milder finish. Letting the second fermentation run longer produces a sharper, more acidic vinegar; bottling it earlier gives a milder one. There’s no fixed “correct” endpoint — it’s a matter of taste.
Storage
Once bottled, homemade apple cider vinegar keeps for months at room temperature in a cool, dark pantry, and even longer in the fridge, since vinegar’s own acidity is what preserves it. It’s normal for the flavour to keep mellowing and deepening slowly over time — unlike most homemade condiments, it doesn’t have a “use by” cliff edge.
Frequently asked questions
Do I need to peel or core the apples first?
No — cores, peels, and even slightly bruised spots all ferment fine. This is actually one of the better uses for apple scraps you’d otherwise throw away.
Why does my vinegar smell like alcohol partway through?
That’s expected and correct. The first stage of fermentation produces alcohol before the acetic acid bacteria convert it to vinegar in the second stage — if you strain and taste it at this point, it will taste more like weak, flat cider than vinegar.
Is the cloudy stuff floating in my finished vinegar safe?
Yes — that’s the “mother,” a colony of beneficial acetic acid bacteria and cellulose. You can strain it out if you prefer a clear vinegar, or leave it in and even use it as a starter for your next batch.
Can I use this homemade vinegar the same way as store-bought?
Yes, in cooking, pickling, and dressings. For drinking diluted in water — the one use with real evidence behind it, covered in the ACV benefits article — start with a smaller amount than you would with commercial vinegar, since homemade batches vary more in strength.
What went wrong if nothing seems to be happening after a week?
Check your kitchen’s temperature first — fermentation slows a lot below about 18°C (65°F). If it’s warm enough and still inactive, the sugar or starter amount may have been too low; stir in another splash of raw vinegar and give it more time before troubleshooting further.
Source: USDA FoodData Central
Found this helpful?